Thursday, 1 December 2011

Corals mini photo shoot

In the last three weeks I have had two colds, strep throat, and a broken tooth.
Andrew has had two colds, and Coral has had one, and then strep throat.
I have been to the walk- in clinic five different times, and had an emergency appointment with the dentist.
I have been on antibiotics, cold and flu medicine, and pain killers. 
I have been exhausted.
I am so over cold and flu season. 

This week I have strep throat, which has pretty much left me flat out in bed....not easy to do when you have a toddler that wants to go go go. She can self entertain VERY well..she can play by herself for hours and hours without needing me. I can fill up her bubbas for the day, and she can help herself to them in the fridge. However she needs to be watched every single second, because she is going through a climbing stage. She will climb anything she can. Turn your back for a second and she will be up on the kitchen table with her animals. So Andrew has had to be extra helpful these last few days. I have pretty much been useless.

He spent some time with her doing a mini photo shoot with his new camera gear. How he got her to sit still I will never know....these days I only ever get pictures of the back of her head.


Shes so beautiful..even with strep throat and purple popsicle all over her face. Thank you hubby for taking such good care of your girls while were sick.

Wednesday, 30 November 2011

Playroom

A little bit of decorating has been done to Corals play room.
I got some money for my birthday, and I knew I wanted to spend a little of that money in the play room. I want it to be a fun space for Coral, but also want it to be appealing to the eye since its right at the top of our stairs. 

I knew I wanted a desk, and some floating shelves. First came the desk (not by choice...Ikea was sold out of the shelves I wanted). I found this desk at Salvation Army. 


I fell in love with it immediately. Mostly because of the shiny white top with the map on it 
drool...if I had a little boy this would have gone in his room
....But I left it at the store....only to go back for it two days later. And of course, I painted it.


This has become Corals little craft station. Doing her coloring, stamps and stickers, and playdough here.

As I mentioned before, Andrew and I made the treck out to Ikea, only to find that the shelves I wanted were not in stock. Were talking about the simple, cheap Lack shelves. I was stunned that they had none in stock. So I waited...waited some more...then waited some more. Finally I decided to check online at Home Depot to see if they have any floating shelves. Turns out they have the exact same shelves as Ikea, for the same price...and I just so happen to live two minutes from Home Depot :) Perfect!


The hubby was not to thrilled to have to put these up for me...buut I asked him on a day that he won $500 to his favourite camera store...he couldn't say no :)


And that is our play room. Painting on the wall is done by my very talented mother-in-law.

Thursday, 24 November 2011

Road-side chair make-over

Remember the chair I picked up for free on the side of the road?

Yah, that one.
Well it got a make-over this week.

I have always wanted to learn how to reupholster a chair....a big chair. And then I had this chair sitting in my room, that was FREE. There was no better opportunity for an experiment, because I couldn't go wrong. If it turned out, awesome. If it didn't...oh well, it was free!

So of course I did a lot of research online before starting this project. I found lots of different tutorials, thanks to Pinterest. The only problem was, I didn't want to do any sewing. My sewing machine is broken, and Im not buying another one any time soon. And it would have taken me so much longer if I had chosen to sew. Now the chair I have, was put together with LOTS of sewing. unfortunately I didn't find many sites that could help me with that, but I got creative on my own. I think it turned out pretty good for my first attempt.

Heres the process I went through to get to the end result.

Start by taking all the fabric layers off the chair. This is a very long and hard process. There are literally hundreds of staples you will be pulling out. This took me about 4 hours to peel apart the chair (I use the word peel because a chair is put together like an onion. Many, many layers).


I labeled EVERYTHING as I was taking it apart so I would remember how to put it back together. I labeled the fabric, as well as the wood where the fabric was stapled too.

I kept whatever I could from the chair. You would be surprised how a chair is put together. But I kept everything, the cardboard and all.  


There may be surprises waiting for you inside the chair. On my last layer, I spotted a sealed plastic bag. Inside of it was a brand new jersey. Super weird.

When I was finished taking the layers off the chair, it looked like this.


I used the old fabric to trace out my new fabric. Since this was my first chair and it was more of an experiment, I decided to get some cheap fabric from Ikea. I used 7 meters for the whole chair at $5.99/meter. 

One mistake I made was not leaving extra room when tracing around the new fabric. Lesson learned for next time.

Then it was time to staple the new fabric on. This part was really fun. Its a lot of tucking, and pulling, and again hundreds of staples. Since my fabric was stripes, I decided it would be easiest to do horizontal lines on the back and seat of the chair, and vertical lines on the arms. Other wise it would have been nearly impossible to line up the fabric perfectly..a task I was not willing to take on during my first big upholstery project.


So this is the back of the chair. All the fabric gets put over the front of the chair, and then gets tucked and pulled to the back where it is stapled. 


Everything gets stapled to the back of the chair, which is then covered up using fabric and metal tack strips. 

back of chair

The arms were the hardest part to do without sewing. Again, I couldn't find any help on the internet, so I had to wing it.


I stapled the fabric around the front of the arm. Then I cut out a piece of cardboard that would cover up the staples. I put nails through the cardboard first, then covered up the other side of the cardboard. Then I hammered the cardboard piece in right over top of the other fabric. Like this:


Are you ready for the end result?


Ta-daaaa! Isn't she a beauty? It was about six hours of hard work, but the end result was worth it. I did learn a lot throughout the whole process. I made a few mistakes, and the chair is far from perfect, but it was a good learning experience. Im excited to try this again with other chairs I find....I can only get better each time I do it. And the total cost of the chair...$42. Not bad eh!

Friday, 18 November 2011

Decorating update

As I looked around the house this morning, I realized there have been lots of little changes that I haven't shared with you. So let me give you the latest decor update.

An old barn door hung on the wall, which will also be used to pin things up such as reminders, or Corals church crafts.
Fall/winter look with new pictures hung and new pillows
New hooks in the entry way. Now you can hang up your coat when you visit!
Chalk board paint on the closet doors in Corals big girl room.
Freshly painted dresser for Corals big girl room
New things hung on the wall in Corals big girl room...its beginning to look girlie in there!
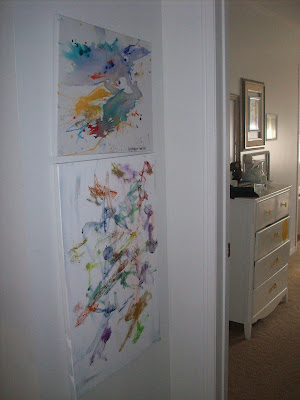
More of Corals paintings hung up
Master bedroom is starting to look more cozy
The bench from outside is now safely inside for the winter and is resting at the end of our bed...which it just might stay there :)
And there you have it! Stay tuned though...things are always changing around here. AND Im excited to share with you soon the changes I have made in Corals play room. Happy winter decorating everyone.

Thursday, 17 November 2011

Its beginning to look a lot like CHRISTMAS!

My birthday has come and gone...and you know what that means don't you?
Christmas decorating!

Usually Andrew doesn't like decorating for Christmas, and he always pokes fun about how early I decorate (why go through all that work to only have it up for a few weeks?) This year I discovered a little trick. Ask for help setting up the tree on my birthday, and he can't say no!

So this past Saturday, the tree went up.
We have a big tree (that momma decorates) and we have a little tree (that Coral decorates).

Coral was thrilled when we brought up her little tree.


Ta-da! The finished product:

Andrew set up the tree for me on Saturday, but I really wasn't feeling well. So it sat there with no decorations for a few days until I finally had the energy to do it.

I really only decorate the one room in our house. It makes it easy for putting up, and taking down once the Christmas season is over. And that way the house doesn't look over cluttered and crowded with things.

This is our Christmas room.


Coral broke one ornament off the tree when it was first decorated. It scared her, and she hasn't touched the tree since.

Were getting excited for Christmas in the Hodgson house. 

Thursday, 10 November 2011

My Latest Find

Its no secret that Im a garbage picker.
No you don't have to worry about me going through your garbage bags, but if I do see something in your pile of trash that I fancy, I wont hesitate to pick it up.

Meet my latest side of the road find.


While driving home from my in-laws a couple of weeks ago, I spotted this beauty on the side of the road in our subdivision. Andrew had just picked up the Timbren van, and we got home at the same time. He hadn't even gotten out of the van yet when I yelled "Hey there is a chair I want right by the park." A few minutes later, it was sitting in our house.

Now its not perfect. Thankfully it wasn't dirty at all, or smelly (eesh), however it did have some rips in it and is missing a back leg. It was to good of a chair to give up, and I knew I could sew the rips, and find a replacement leg at Home Depot. After a bit of sewing, a little bit of fabric glue, and lots of disinfecting (I said it wasn't dirty but that doesn't mean I wasn't going to clean it), it is ready to be used once again.

You can still see the places where I had to sew, but I don't mind. I love the chair. I love the fabric, and the shape. I love that it tells a story. I love that I saved it from going to the dump. And I love that it was free.